Introduction: When Italy Meets the Tropics in Perfect Harmony
Mango Panna Cotta is the dessert that taught me that sometimes the simplest recipes create the most memorable moments. Seven years ago, I was invited to a dinner party where the host served what looked like ordinary panna cotta. But when my spoon broke through that silky surface, I tasted the tropical sweetness of perfectly ripe mango layered with rich Italian cream.
That night marked the beginning of my obsession with perfecting this elegant dessert. I’ve since made Mango Panna Cotta dozens of times, testing every variable. I’ve experimented with different gelatin ratios, various cream-to-milk proportions, and alternative sweeteners, along with fresh versus pureed mango.
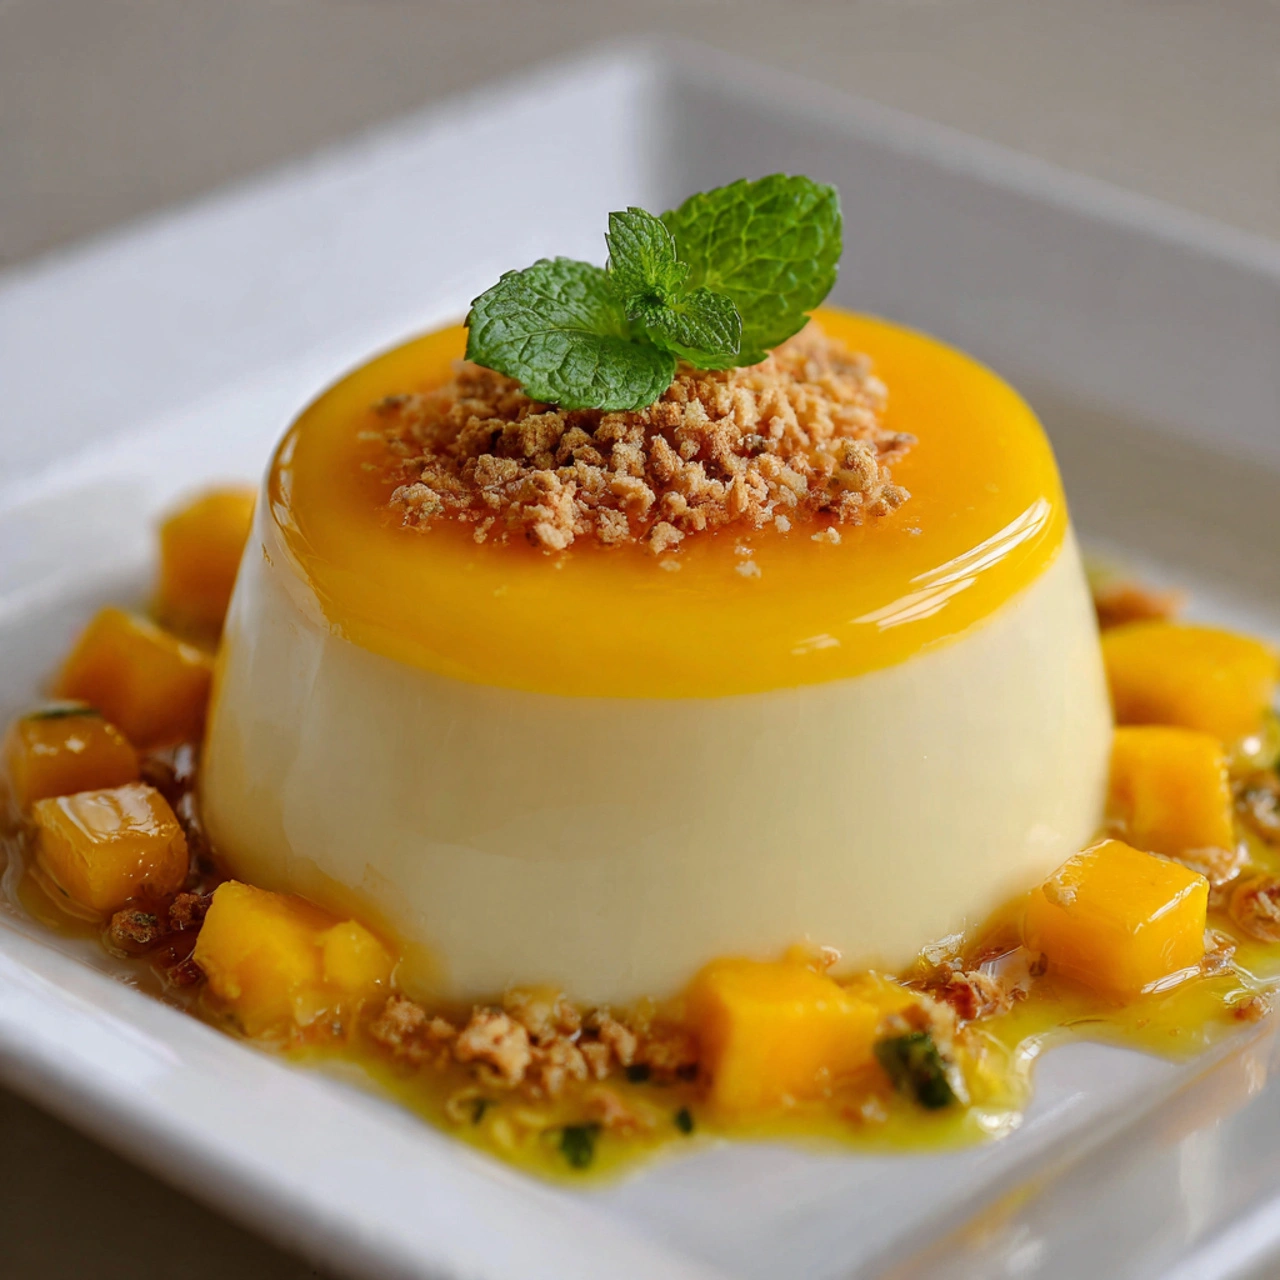
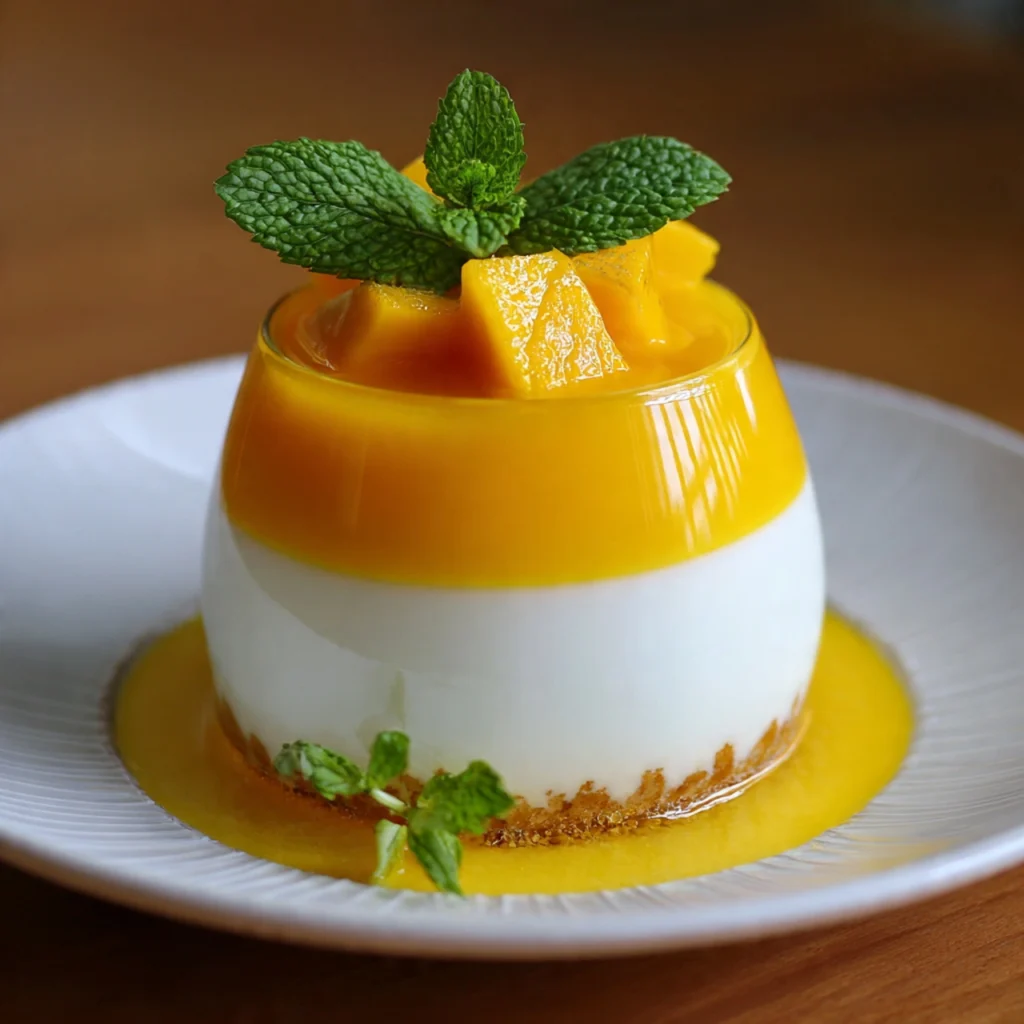
What makes this Mango Panna Cotta so irresistible is the contrast of textures and flavors. The base is classic Italian panna cotta—barely set, trembling on the plate, melting on the tongue with that characteristic silky richness. Then comes the mango layer: vibrant, tropical, sweet with a hint of tartness that cuts through the cream’s richness.
I’ve served this dessert at countless dinner parties and holiday gatherings. I’ve watched guests’ eyes light up at first bite. That moment when they realize they’re eating something extraordinary is unforgettable.
The beauty of Mango Panna Cotta lies not just in its exquisite taste but also in its versatility and accessibility. Unlike temperamental desserts that require precise technique and specialized equipment, panna cotta is forgiving.
In this comprehensive guide, I’ll share everything I’ve learned about creating flawless Mango Panna Cotta. From blooming gelatin properly to achieving that perfect wobble to creating stunning presentation, you’ll master every aspect of this beloved Italian dessert with a tropical twist.
Panna Cotta is also great for meal prep. You can make it ahead of time, allowing flavors to meld and intensify. This makes it ideal for entertaining or busy weeknights!
Ingredients: Crafting Your Perfect Mango Panna Cotta
Quality ingredients are essential for panna cotta since there are so few components. Each one plays a starring role.
For the Panna Cotta Base:
- 2 cups heavy cream (at least 36% fat; don’t substitute)
- 1 cup whole milk (full-fat for best texture)
- ½ cup granulated sugar (or superfine sugar for smoother dissolving)
- 2 teaspoons unflavored gelatin powder (from about 1 packet; Knox brand works well)
- 3 tablespoons cold water (for blooming the gelatin)
- 1 teaspoon vanilla extract (pure, not imitation)
- Pinch of salt (enhances sweetness and flavor)
For the Mango Layer:
- 2 ripe mangoes (about 2 cups pureed; Alphonso or Ataulfo varieties are sweetest)
- ¼ cup granulated sugar (adjust based on mango sweetness)
- 1 teaspoon unflavored gelatin powder (about ½ packet)
- 2 tablespoons cold water (for blooming)
- 1 tablespoon fresh lime juice (brightens the mango flavor)
- 2 tablespoons water or mango nectar (for thinning if needed)
Optional Garnishes:
- Fresh mango cubes (for topping)
- Mint leaves (adds color and freshness)
- Toasted coconut flakes (for tropical flair)
- Passion fruit pulp (for extra tropical complexity)
- Edible flowers (for elegant presentation)
- Fresh mango cubes (for topping)
- Mint leaves (adds color and freshness)
- Toasted coconut flakes (for tropical flair)
- Passion fruit pulp (for extra tropical complexity)
- Edible flowers (for elegant presentation)
Equipment You’ll Need:
- Small saucepan
- Medium saucepan
- Whisk
- Fine-mesh strainer
- Blender or food processor
- 6-8 ramekins, small bowls, or serving glasses (4-6 oz capacity)
- Measuring cups and spoons
- Ladle or spouted measuring cup
Understanding Gelatin
Gelatin is what gives panna cotta its characteristic silky-firm texture. The ratio of gelatin to liquid is crucial—too little and your panna cotta won’t set; too much and it becomes rubbery. The standard ratio is about 1 teaspoon of gelatin per cup of liquid for that perfect “trembling” texture.
Always bloom gelatin before using. This means sprinkling it over cold water and letting it sit for 5 minutes until it absorbs the water and looks spongy. This step ensures even distribution throughout your cream mixture and prevents lumps.
Different gelatin brands can have slightly different strengths, so if using sheet gelatin (common in professional kitchens), you’ll need about 3 sheets for this recipe. Follow the package conversion guidelines.
Selecting Mangoes
The mango variety matters significantly for flavor. My favorites for panna cotta are:
Alphonso (Indian mangoes): Considered the king of mangoes, these have incredible sweetness and almost no fibrous texture. They’re seasonal (spring/early summer) and worth seeking out.
Ataulfo (Honey mangoes): These small, golden mangoes are reliably sweet with smooth flesh and minimal fiber. They’re more widely available than Alphonso.
Tommy Atkins: The most common supermarket variety. They work but are less sweet and more fibrous. Choose very ripe ones with lots of give when pressed.
Your mangoes should be ripe—they’ll smell sweet and fragrant, give slightly when gently pressed, and may show some wrinkling around the stem. Unripe mangoes will be too tart and lack that luscious tropical flavor.
Cream Quality Matters
Heavy cream (also called heavy whipping cream) contains at least 36% butterfat. This high fat content is essential for panna cotta’s richness and silky texture. Light cream or half-and-half won’t work—they don’t have enough fat.
Look for cream without stabilizers or additives for the purest flavor. Organic or grass-fed cream often has superior taste, though regular heavy cream works perfectly fine.
Step-by-Step Instructions: Creating Flawless Mango Panna Cotta
Follow these steps carefully for panna cotta that’s silky, perfectly set, and restaurant-quality.
Step 1: Bloom the Gelatin for Panna Cotta Base
Pour 3 tablespoons of cold water into a small bowl. Sprinkle 2 teaspoons of gelatin evenly over the surface. Don’t dump it in a pile—distribute it across the water so it blooms evenly.
Let it sit undisturbed for 5 minutes. The gelatin will absorb the water and swell, taking on a spongy, wrinkled appearance. This is called “blooming” and it’s essential for smooth incorporation.
Step 2: Heat the Cream Mixture
In a medium saucepan, combine the heavy cream, whole milk, sugar, and salt. Heat over medium heat, stirring occasionally to dissolve the sugar. Don’t walk away—you want to heat this just until it’s steaming and small bubbles form around the edges. Do not let it boil.
This should take about 5-7 minutes. The mixture is ready when you can see wisps of steam rising and the sugar has completely dissolved.
Step 3: Incorporate the Gelatin
Remove the cream mixture from heat. Add the bloomed gelatin to the hot cream and whisk vigorously for about 30 seconds until the gelatin completely dissolves. You shouldn’t see any granules or lumps—the mixture should look homogeneous.
Stir in the vanilla extract. The aroma at this point is intoxicating—pure vanilla and sweet cream.
Step 4: Strain and Pour
Pour the mixture through a fine-mesh strainer into a bowl with a spout (a large measuring cup works great). This removes any undissolved gelatin bits or milk skin, ensuring silky-smooth panna cotta.
Divide the mixture evenly among your ramekins or serving glasses. I use a ladle or pour directly from the measuring cup. Fill each vessel about two-thirds full to leave room for the mango layer.
Step 5: First Chill
Carefully transfer the filled ramekins to the refrigerator. They need to chill for at least 3-4 hours until completely set. The panna cotta should be firm enough that it doesn’t ripple when you gently shake the ramekin.
This first layer must be fully set before adding the mango layer, or they’ll mix together instead of creating distinct layers.
Step 6: Prepare the Mango Layer
While the panna cotta sets, make your mango topping. Peel and dice your mangoes, removing all flesh from the pit. You should have about 2 cups of mango chunks.
Place the mango in a blender with the sugar and lime juice. Blend on high speed until completely smooth—no chunks should remain. Taste and adjust sweetness if needed. The puree should be intensely mango-flavored and pleasantly sweet.
Strain the puree through a fine-mesh sieve to remove any fibers. This creates an ultra-smooth layer.
Step 7: Bloom Gelatin for Mango Layer
Pour 2 tablespoons of cold water into a small bowl. Sprinkle 1 teaspoon of gelatin over it and let bloom for 5 minutes.
Heat ¼ cup of the mango puree in a small saucepan over medium heat until steaming (don’t boil). Remove from heat and whisk in the bloomed gelatin until completely dissolved.
Pour this gelatin-mango mixture back into the remaining mango puree and stir well. If the mixture seems very thick, thin it with a tablespoon or two of water or mango nectar.
Step 8: Add Mango Layer
Once your panna cotta base is fully set (3-4 hours later), gently spoon or pour the mango mixture over the top of each panna cotta. Work slowly and carefully—you don’t want to disturb the cream layer beneath.
The mango layer should come to just below the rim of your ramekins, leaving a little space at the top.
Step 9: Final Chill
Return the ramekins to the refrigerator and chill for at least 3-4 hours, preferably overnight. This allows the mango layer to set properly and the flavors to meld.
The Mango Panna Cotta is ready when both layers are fully set but still have that characteristic wobble when gently shaken.
Step 10: Serve
You can serve Mango Panna Cotta directly in the ramekins (easiest and prevents any mishaps) or unmold them onto plates for a more elegant presentation.
To unmold: Run a thin knife around the edge of the panna cotta. Dip the bottom of the ramekin in hot water for 3-5 seconds (no more or it’ll start melting). Place a serving plate over the ramekin, flip quickly, and give it a gentle shake. The panna cotta should slide out. If it doesn’t, dip again for another 2-3 seconds.
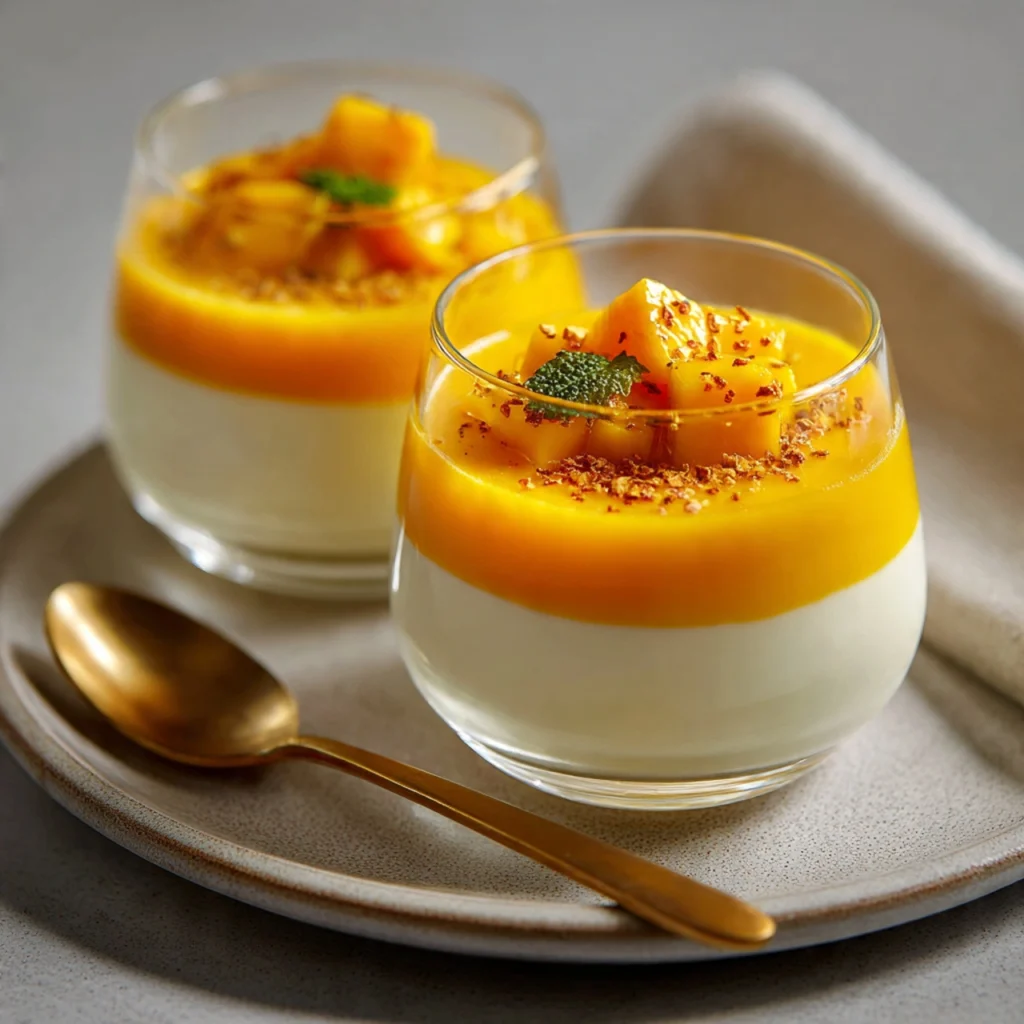
Garnish with fresh mango cubes, mint leaves, or any other garnishes you’ve prepared.
Pro Tips for Perfect Mango Panna Cotta
These insider secrets come from years of making (and occasionally failing at) panna cotta.
1. Don’t Boil the Cream
Boiling cream can cause it to develop a skin, change texture, or even curdle slightly. Heat just until steaming with small bubbles around the edges. If you accidentally boil it, strain it well before adding gelatin.
2. Achieve the Perfect Wobble
The ideal panna cotta has a delicate wobble—it should jiggle when shaken but hold its shape. This comes from the right gelatin ratio. If yours is too firm, reduce gelatin by ¼ teaspoon next time. Too loose? Add ¼ teaspoon more.
3. Let Layers Set Completely
Patience is crucial. If you add the mango layer before the cream layer is fully set, they’ll blend together creating a marbled effect rather than distinct layers. Test by gently tilting the ramekin—the surface shouldn’t ripple.
4. Use Room Temperature Mango Puree
If your mango puree is ice cold from the refrigerator when you pour it over the set panna cotta, the temperature shock can cause the cream layer to weep or separate. Let the mango mixture come to cool room temperature before layering.
5. Prevent Condensation
When chilling panna cotta in the refrigerator, loosely cover the ramekins with plastic wrap. This prevents them from absorbing refrigerator odors and keeps the surface smooth. Don’t seal tightly or condensation will form on the surface.
6. Make Them a Day Ahead
Panna cotta actually improves with time as the flavors meld. Making them a day ahead is perfect—the texture sets beautifully and you’re not rushed on the day of serving.
7. Try Different Serving Vessels
While ramekins are traditional, try serving in wine glasses, martini glasses, or small Mason jars for different presentations. Clear glasses show off the beautiful layers.
8. Control Sweetness
The sweetness should be pleasant but not cloying. Remember that cold desserts taste less sweet than room-temperature ones, so your mixture should taste slightly sweeter than you want the final product to be.
9. Add Texture Contrast
Panna cotta is wonderfully smooth, so contrasting textures elevate it. Try toasted coconut, crushed pistachios, or crumbled cookies on top for crunch.
10. Emergency Fixes
If your panna cotta doesn’t set after 6 hours, you can gently reheat it, bloom more gelatin, add it to the mixture, and re-chill. If it’s too firm, there’s unfortunately no fix—but it’ll still taste good even if the texture isn’t perfect.
Common Mistakes to Avoid with Mango Panna Cotta
Even experienced cooks make errors with panna cotta. Here’s what to watch for.
Mistake #1: Using Too Much or Too Little Gelatin
This is the most common error. Too much gelatin creates rubbery, bouncy panna cotta that’s unpleasant to eat. Too little and it won’t set properly, remaining liquid or too loose. Measure carefully and follow the ratio of about 1 teaspoon gelatin per cup of liquid.
Mistake #2: Not Blooming Gelatin Properly
Adding gelatin powder directly to hot liquid creates lumps that never fully dissolve. Always bloom gelatin in cold water first, letting it sit for the full 5 minutes until spongy. This ensures smooth incorporation.
Mistake #3: Boiling the Gelatin
Once you’ve added gelatin to your cream mixture, never let it boil. Boiling can break down gelatin’s setting properties, resulting in panna cotta that doesn’t set properly. Keep the heat at medium or below.
Mistake #4: Moving Panna Cotta Before It Sets
If you jostle or move panna cotta while it’s in the early stages of setting, you can disturb the delicate structure. Place ramekins on a baking sheet for easy transfer to the fridge, then don’t move them until fully set.
Mistake #5: Using Fibrous Mangoes
Some mango varieties are very fibrous, with stringy bits that create texture issues in the smooth puree. Always strain your mango puree through a fine-mesh sieve to remove fibers, or choose less fibrous varieties like Ataulfo.
Mistake #6: Over-Dipping When Unmolding
When unmolding panna cotta, a quick 3-5 second dip in hot water is enough. Leaving it in hot water too long starts melting the gelatin, and you’ll end up with a puddle instead of a perfect dome.
Mistake #7: Forgetting to Strain
Straining the cream mixture removes any bits of undissolved gelatin or milk skin, ensuring the smoothest possible texture. Don’t skip this step—it’s the difference between amateur and professional results.
Mistake #8: Not Tasting as You Go
Always taste your mixtures before chilling. Once set, you can’t adjust sweetness or flavor. Make sure both the cream mixture and mango puree taste good to you before proceeding.
Storage and Serving Suggestions for Mango Panna Cotta
Panna cotta is an excellent make-ahead dessert. Here’s how to store and serve it perfectly.
Refrigerator Storage
Mango Panna Cotta keeps beautifully in the refrigerator for up to 4 days. Cover each ramekin tightly with plastic wrap, pressing it directly against the surface to prevent a skin from forming.
The texture and flavor actually improve over the first 24 hours as everything sets and melds. After 4 days, the gelatin may start to weep slightly and the texture can become a bit grainy.
Can You Freeze Panna Cotta?
I don’t recommend freezing panna cotta. The gelatin structure breaks down when frozen and thawed, resulting in a grainy, separated texture. It’s best enjoyed fresh from the refrigerator.
Serving Temperature
Panna cotta should be served cold but not ice-cold. Remove from the refrigerator about 10-15 minutes before serving to take the chill off slightly. The flavors are more pronounced at this temperature.
Serving Suggestions
For Dinner Parties: Make individual servings in elegant ramekins or glasses. Garnish just before serving for the freshest presentation. Prepare them the day before to save time.
For Casual Gatherings: Serve in small Mason jars that guests can eat from directly. Top with fresh fruit and a sprig of mint. These are portable and easy.
As a Plated Dessert: Unmold onto plates and surround with fresh mango cubes, a drizzle of passion fruit syrup, and edible flowers for a restaurant-quality presentation.
For Dinner Parties: Make individual servings in elegant ramekins or glasses. Garnish just before serving for the freshest presentation. Prepare them the day before to save time.
For Casual Gatherings: Serve in small Mason jars that guests can eat from directly. Top with fresh fruit and a sprig of mint. These are portable and easy.
As a Plated Dessert: Unmold onto plates and surround with fresh mango cubes, a drizzle of passion fruit syrup, and edible flowers for a restaurant-quality presentation.
Brunch Offering: Panna cotta isn’t just for dinner! Serve as part of a brunch spread alongside pastries and fruit. The light, creamy texture is perfect for morning.
With Coffee or Tea: This dessert pairs beautifully with espresso, cappuccino, or Earl Grey tea. The richness of the cream complements coffee wonderfully.
Make-Ahead Strategy
2 days ahead: Make the panna cotta base, chill until set.
1 day ahead: Add the mango layer, chill overnight.
Day of serving: Add garnishes just before serving.
This timeline ensures maximum freshness while spreading out the work.
Presentation Ideas
For special occasions, serve Mango Panna Cotta with:
- A pool of passion fruit coulis on the plate
- Fresh berries and mango cubes scattered around
- A tuile cookie or crispy wafer for height
- Candied lime zest for texture and visual appeal
- A quenelle of whipped coconut cream
Frequently Asked Questions About Mango Panna Cotta
1. Can I make panna cotta without gelatin?
Traditional panna cotta requires gelatin for its characteristic texture. However, you can use agar agar (a plant-based alternative) for vegetarian/vegan versions. Use about ½ teaspoon agar powder per cup of liquid. Note that agar sets firmer than gelatin and has a slightly different texture—less silky, more solid.
2. Why didn’t my panna cotta set?
Several possible reasons: not enough gelatin, gelatin that was too old (loses potency over time), gelatin was boiled (breaks down its setting properties), or insufficient chilling time. Make sure you’re using fresh gelatin, measuring accurately, not boiling the mixture, and chilling for at least 4 hours.
3. Can I use other fruits instead of mango?
Absolutely! This recipe works with many fruits. Try strawberry, raspberry, passion fruit, peach, or mixed berry puree. Some fruits (like pineapple, papaya, and kiwi) contain enzymes that break down gelatin, so they need to be cooked first or the panna cotta won’t set.
4. How do I unmold panna cotta without it breaking?
The key is a very brief dip in hot water—just 3-5 seconds. Run a thin knife around the edge first to break the seal. Dip the bottom only (not the sides) in hot water, place your serving plate on top, flip confidently, and give it a gentle shake. If it doesn’t release, dip for 2-3 more seconds.
5. Can I make this dairy-free or vegan?
Yes! Replace the heavy cream and milk with full-fat coconut cream (2 cups) and coconut milk (1 cup). Use agar agar instead of gelatin. The texture will be slightly different but still delicious. Make sure to use coconut cream from a can, not the beverage version.
6. Why is my panna cotta grainy or lumpy?
This happens when gelatin doesn’t dissolve completely. Always bloom gelatin first, add it to hot (not boiling) liquid, whisk thoroughly, and strain the mixture. These steps prevent lumps and ensure silky texture.
7. How far in advance can I make Mango Panna Cotta?
You can make it up to 2 days ahead for optimal texture, or up to 4 days if necessary. The texture is actually best after 24 hours. Make sure to cover well to prevent the surface from drying out or absorbing refrigerator odors.
8. Can I skip the mango layer?
Of course! Classic panna cotta doesn’t have a fruit layer. You can serve plain vanilla panna cotta with fresh fruit on the side, or top with any sauce or compote you like. The mango layer is delicious but optional.
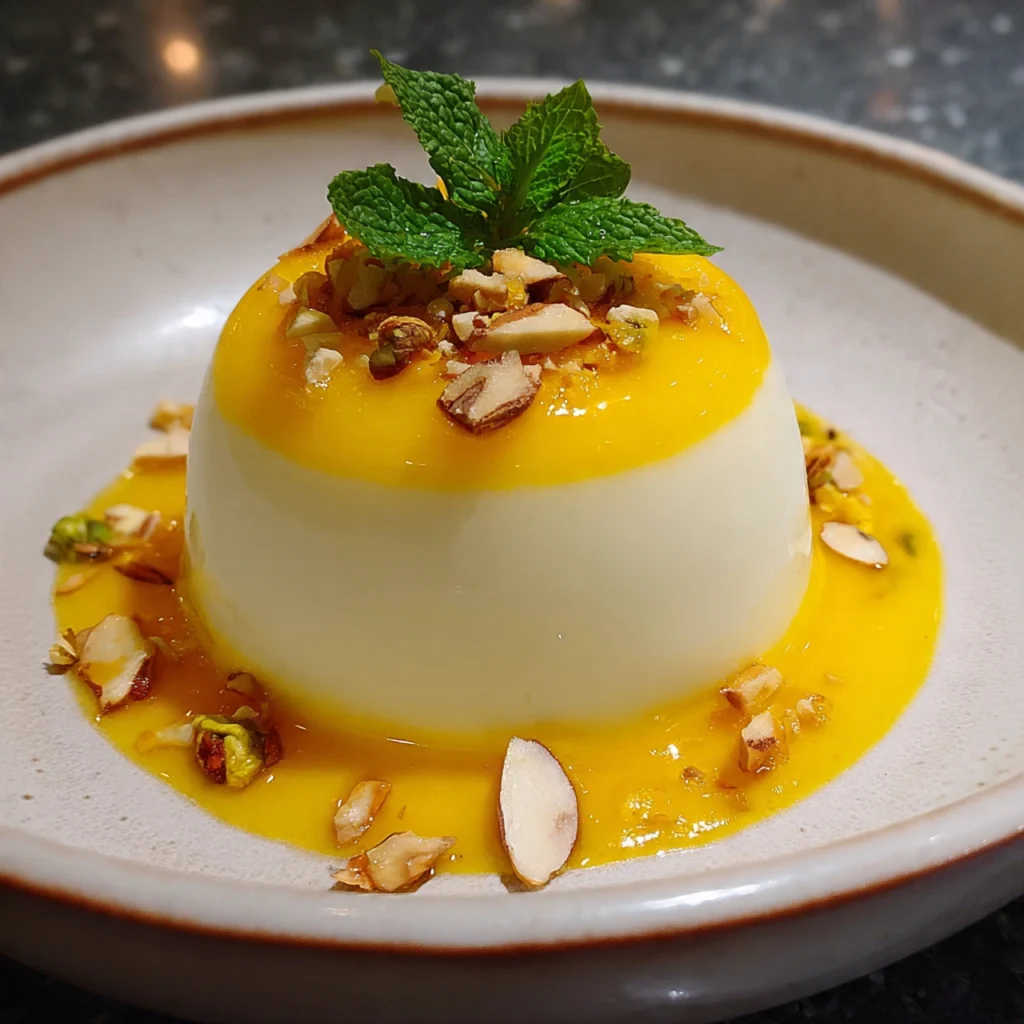
Serving Mango Panna Cotta chilled enhances its richness, making it a delightful experience for your taste buds!
Nutrition Information (Per Serving, Recipe Makes 6 Servings)
Please note these are approximate values and will vary based on exact ingredients:
- Calories: 285
- Total Fat: 18g
- Saturated Fat: 11g
- Trans Fat: 0g
- Cholesterol: 65mg
- Sodium: 45mg
- Total Carbohydrates: 28g
- Dietary Fiber: 1g
- Sugars: 26g
- Protein: 4g
- Vitamin A: 15% DV
- Vitamin C: 35% DV
- Calcium: 8% DV
- Iron: 2% DV
Dietary Information:
- Vegetarian (contains dairy and gelatin)
- Gluten-Free (naturally contains no gluten)
- Not Vegan (contains dairy and gelatin; can adapt)
- Not Dairy-Free (can adapt with coconut cream)
- Not Low Calorie
- Not Low Fat (contains heavy cream)
- Kosher (if using kosher gelatin)
- Halal (if using halal gelatin)
Note: To reduce calories and fat, you can use half heavy cream and half whole milk (instead of the listed proportions), though the texture will be less rich. Using light cream isn’t recommended as it affects the characteristic silky texture too much.
Final Thoughts: Why Mango Panna Cotta Will Become Your Signature Dessert
After two decades of making desserts, I can confidently say that some recipes transcend mere food and become experiences. This Mango Panna Cotta is one of those rare creations. It’s the dessert that makes people pause mid-conversation.
What I love most about this recipe is how it defies expectations. It looks complicated and refined—something you’d expect at an upscale Italian restaurant. But the process is simple and achievable for everyone.
I’ve taught this recipe in cooking classes to nervous home cooks who’d never made panna cotta before. I’ve watched their faces light up when they realize it’s actually achievable. seen them serve it at their own gatherings and experience that wonderful feeling of creating something that truly impresses.
The fusion of Italian technique with tropical fruit is what makes this dessert so special. The panna cotta base is pure Italian tradition—minimalist, elegant, allowing the quality of the cream to shine.
Beyond the taste and presentation, I appreciate how this dessert fits into real life. It’s make-ahead friendly, which means you can prepare it when you have time rather than rushing on the day of your event.
My final advice: don’t save this recipe only for special occasions. Yes, it’s elegant enough for your fanciest dinner party. But it’s also simple enough to make on a random Tuesday when you want something special.
And when you serve that first batch of Mango Panna Cotta—when you see your guests’ expressions as they taste that perfect balance of rich cream and tropical fruit—you’ll understand why this dessert has become one of my most treasured recipes.
Welcome to the wonderful world of Mango Panna Cotta. Your dessert repertoire is about to get significantly more impressive.
PrintMango Panna Cotta: The Silky Italian Dessert That Conquered My Heart
This Mango Panna Cotta is an exquisite fusion of Italian elegance and tropical flavor. The classic Italian “cooked cream” dessert gets a vibrant makeover with a layer of sweet, velvety mango puree on top. The base is traditional panna cotta—barely set, silky-smooth, and melt-in-your-mouth rich with pure cream and vanilla. Topped with bright, tropical mango that’s been pureed until perfectly smooth, this dessert delivers incredible contrast: rich and light, creamy and fruity, sophisticated and playful. It’s surprisingly easy to make with no oven required, making it the perfect make-ahead dessert for dinner parties.
- Prep Time: 20 minutes (active)
- Cook Time: 10 minutes
- Total Time: 6-8 hours
- Yield: 6-8 servings (depending on ramekin size)
- Category: Dessert / Italian / Elegant Dessert / No-Bake
- Method: Setting with Gelatin / No-Bake / Chilling
- Cuisine: Italian / Fusion
- Diet: Vegetarian
Ingredients
For the Panna Cotta Base:
- 2 cups heavy cream
- 1 cup whole milk
- ½ cup granulated sugar
- 2 teaspoons unflavored gelatin powder
- 3 tablespoons cold water (for blooming gelatin)
- 1 teaspoon vanilla extract
- Pinch of salt
For the Mango Layer:
- 2 ripe mangoes (about 2 cups pureed)
- ¼ cup granulated sugar
- 1 teaspoon unflavored gelatin powder
- 2 tablespoons cold water (for blooming)
- 1 tablespoon fresh lime juice
- 2 tablespoons water (if needed for thinning)
Optional Garnishes:
- Fresh mango cubes
- Mint leaves
- Toasted coconut flakes
Instructions
- Bloom gelatin for base: Sprinkle 2 teaspoons gelatin over 3 tablespoons cold water in a small bowl. Let sit 5 minutes until spongy.
- Heat cream mixture: In a medium saucepan, combine heavy cream, milk, sugar, and salt. Heat over medium until steaming (not boiling), stirring to dissolve sugar, about 5-7 minutes.
- Add gelatin: Remove from heat and whisk in bloomed gelatin until completely dissolved, about 30 seconds. Stir in vanilla extract.
- Strain and pour: Strain mixture through fine-mesh sieve into a spouted container. Divide evenly among 6-8 ramekins, filling about two-thirds full.
- First chill: Refrigerate 3-4 hours until completely set and firm.
- Make mango layer: Blend mango chunks, sugar, and lime juice until smooth. Strain to remove fibers.
- Bloom gelatin for mango: Sprinkle 1 teaspoon gelatin over 2 tablespoons cold water. Let bloom 5 minutes. Heat ¼ cup mango puree until steaming, whisk in gelatin until dissolved. Mix back into remaining puree.
- Add mango layer: Once panna cotta base is set, carefully spoon mango mixture over the top of each ramekin.
- Final chill: Refrigerate 3-4 hours or overnight until both layers are set.
- Serve: Serve in ramekins or unmold onto plates. Garnish with fresh mango and mint
Notes
- Use fresh, ripe mangoes for best flavor—Alphonso or Ataulfo varieties are ideal
- Heavy cream (36% fat minimum) is essential; don’t substitute light cream
- Always bloom gelatin in cold water before adding to hot liquid
- Don’t boil cream or gelatin—heat just until steaming
- First layer must be completely set before adding mango layer
- Strain both mixtures for silkiest texture
- To unmold: run knife around edge, dip bottom in hot water 3-5 seconds, invert
- Can make 2 days ahead; best after 24 hours
- Store covered in refrigerator up to 4 days
- For vegan version: use coconut cream and agar agar instead of dairy and gelatin